Non-destructive testing
News: Today for a company safety and reliability in the choice of material has become a key point, for this reason, the majority of the thing and structure around us has been planned to guarantee quality for a long the time. This guarantee is certified applying some technical tests like as the non-destructive testing; the use of these techniques allows to avoid the occurrence of serious breakage in operation that can result in significant economic damage and image to the manufacturing. Punto Netto stands as qualified technical support for companies in the field of non-destructive testing.
The non-destructive testing are among the specialized analyzes necessary to ensure the quality of the materials used by the largest companies around the world. Punto Netto guarantees reliability on non-destructive testing, thanks to the presence within the team of highly qualified technical personnel in accordance with national and international reference standards. The wide transversality of non-destructive techniques related to the ability to detect imperfections in the materials, without damaging them, puts these techniques for the highest steps context of verification of reliability of the components.
The non-destructive testing (CnD), also known as the non-destructive proofs (PnD), these are investigative techniques that allows to check mechanical parts or/and products without altering their physical and geometrical characteristics; the CnD are identified as “the determination of the physical condition of an object realized in such a way as not to damage the functionality for which the object has been built
These examinations have had, in recent years, a large spread because they allow:
• The identification and evaluation of imperfections in terms of geometric discontinuities (porosity , fissures or cracks) or inclusions of impurities , able to downgrade the structural qualities of the piece in question
• Increased safety of operation of the pieces ( longer useful life , lower probability of failure and / or interruption );
• Lightweight construction and the possibility of prediction of failure and / or breakage which systematically on particular areas:
• Reduction of costs (ex. Check of semi-finished before they are made the finished products)
Non-destructive testing are divided into two families:
• Surface non-destructive testing : that give the opportunity to review the details only on the surface and sub-surface to the maximum. With the application of these test methods only provides the possibility of locating the possible presence of defects, identifying only their shape and size, and then are unable to accurately quantify the depth of the defect.
•Volumetric non-destructive testing: give you the opportunity to investigate the existence of internal defects to the component.
Since the methods of volumetric and surface examination have limitations, to increase the reliability of the control is a good rule to match a technique of volumetric control with a surface control.
The methods of surface not destructive testing surface are:
• Visual Inspection
• Liquid penetrating testing
• Magnetic Particle testing
The methods of volumetric not destructive are:
• Ultrasound testing
VISUAL INSPECTION O ENDOSCOPY
Visual inspection includes inspection of the objects with the naked eye or with only the aid of lenses or fiber optic endoscopes, rigid or flexible (small cameras, that in some cases, do not reach the diameter of five millimeters), which allow access also within particular geometrically complex and inaccessible. Obviously visual examination can only reveal macroscopic defects and surface may seem unnecessary to search for internal defects. In fact allows to immediately determine which are the most suitable surfaces to be scanned with any probes suitable for the purpose (for example, the ultrasonic probes). As non-destructive testing visual inspection plays a very important role, and only the inexperienced may seem a simple technique or trivial. Allows the detection of defects in oxidation, corrosion, erosion, impact and fracture of external and internal surfaces (endoscopy).
On the basis of the accessibility to the surface are distinguished:
-Direct: a distance of the surface is not greater than about 60 cm, with an angle of not less than 30°. They can be used lenses and mirrors. The lighting, by appropriate lamp, between 150 and 600 lux.
- Indirect: if you cannot go directly to the surface to be examined. Used: mirrors, telescopes, endoscopes, fiber optics, cameras, etc. Tools should have a resolution of at least that of the human eye.
LIQUID PENETRANT TESTING
The liquid penetrant examination is based on the ability of penetration of some liquids can fit in discontinuity of solids such as cracks, crevices, pores as long as emerge on the surface to be examined. It uses the ability of some liquid to go through by capillarity and not by gravity inside surface defects.
A liquid substance with low surface tension (and high wetting power) is deposited on the test piece and a second substance (detector) highlights the capillary rise.
The surface tension can be thought like as the force acting between the molecules to the surface of a liquid.
Wettability: uses the ability of a liquid to spread on a surface, and it is favored by low surface tension.
If the contact angle is <90 °, the surface is effectively wetted by the liquid.
If the contact angle is> 90 ° the cohesive forces between the molecules are larger than the adhesive force, therefore, the liquid assumes the appearance of drops disjoint.
Capillarity: is a phenomenon that allows a liquid getting into very thin tubes. This phenomenon is explained by the existence of attractive forces between the molecules of the liquid and the walls of the tube.
1) Preparation of the surface;
2) Application of penetrating liquid;
3) Removal of excess penetrating liquid;
4) Wait for drying;
5) Application of the detector;
6) Observation of the indications.
When the surface, to test, has been thoroughly cleaned, degreased and dried, the penetrating, usually red or fluorescent, is applied by dipping, brushing or spraying.
The penetrating liquid must form a uniform layer covering the entire surface to be tested and must be left to work for a time sufficient to allow the maximum possible absorption by the defect.
The penetration time depends on the type of discontinuity to be detected and the type of product used for the control (typically takes a time equal to 10 minutes).
The excess penetrating liquid must be removed, using cloth lightly dampened, running water or spray washing, paying attention do not eliminate even the liquid trapped in the defects.
Drying occurs extremely quickly (a few minutes).
After drying apply a thin layer of the detector (white or fluorescent) in order to absorb and draw towards the surface the penetrant trapped in the discontinuity.
MAGNETIC PARTICLE TESTING
This technique is based on the analysis of changes in the magnetic field occurring in the presence of surface defects or sub-surface. Can only be applied on ferromagnetic materials (ex. Iron, nickel, cobalt and some of their alloys).
The physical principle on which it is based is the magnetism. Magnetism is defined as the property of matter to win over other material, discovered by the Greeks.
The Yoke is a portable, easily used on site.
It is composed by an electrical winding coil around a body, U-shaped, soft-iron. In practice it is an electro-magnet. The passage of current generates the magnetic field. The U-shape allows the quick and easy positioning on the particular to control. The poles of the electromagnet can be fully articulated, this allows the use of the yoke for the control of parts having different shapes and dimensions without compromising the sensitivity of the method. The yoke may use either alternating current or direct current.
The direct current provides greater penetration while the alternating current concentrates the magnetic field on the surface of the piece providing a good sensitivity for the detection of surface discontinuities in a relatively restricted area. In general the discontinuities to be detected should be in the central area, between the two poles of the yoke and are oriented perpendicular to the imaginary line joining the poles themselves.
Diagram of the monitoring procedure
1. Preparation of the surface;
2. Magnetization of the piece;
3. Application of magnetic powder;
4. Lighting and inspection of the surface;
5. Demagnetization of the item (optional).
The presence of cracks or other defects causes a "break" of the natural magnetic field of the piece, and the metal particles magnetized are grouped in correspondence of discontinuity highlighting the defect.
The particles are made visible by a Wood lamp.
ULTRA SOUND TESTING
The inspection by ultrasound is a non-destructive method in which high frequency sound waves are introduced into the material to be examined, in order to detect surface defects and internal, measure the thickness of materials, measure the distance and the size of defects.
The technique is essentially based on the phenomenon of transmission of an acoustic wave in the material. Ultrasounds are elastic waves of vibrational type with a frequency between 1 and 10 MHz.
The ultrasound waves may be transversal and longitudinal type and have a capacity of penetration into the material that is inversely proportional to their frequency. Of course the capacity of penetration depends also on the intrinsic characteristics of the material that must be crossed and, in particular, the main characteristic of the means which have to cross, is the acoustic impedance "Z" defined as the product of its density "R" for the speed of propagation wave in the middle.
The ultrasound generated are transferred directly into the material to be controlled through contact, or more properly the simple combination of the generator (transducer) to the surface of the piece.
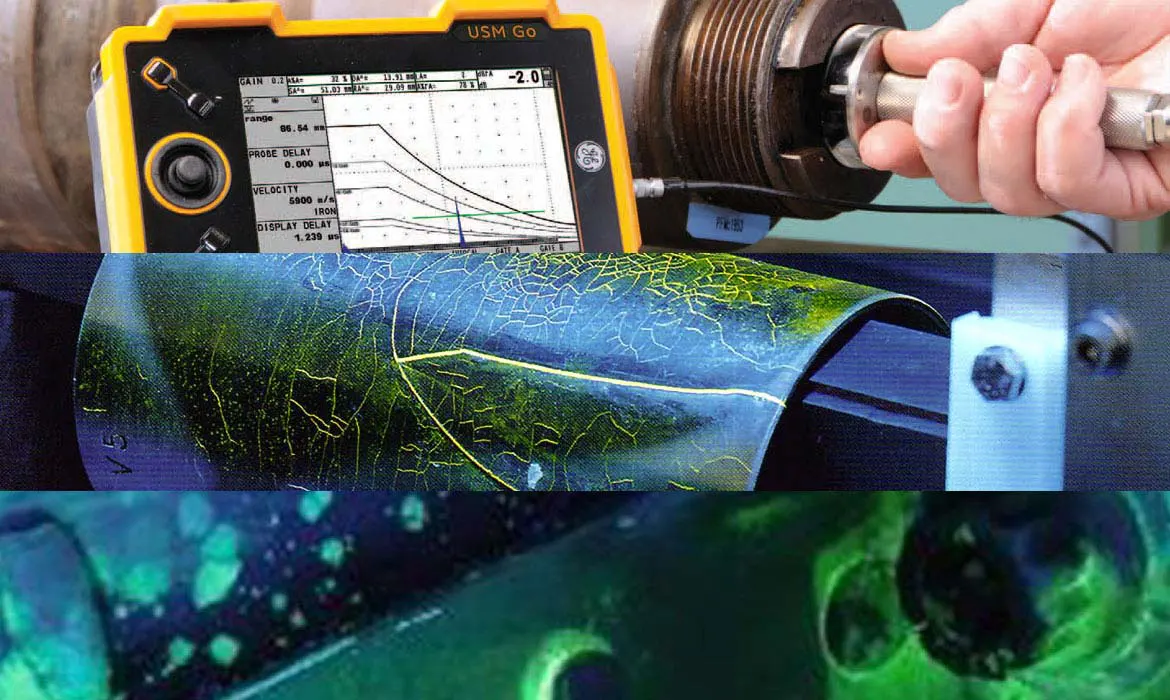
The beam of ultrasonic waves propagate in the material to be examined with the same frequency of the generator and with a speed that depends on the material traversed. When the beam bumps an obstacle will be reflected, absorbed or deflected according to the laws common to all the phenomena of propagation of the waves. The starting signal of the ultrasound (echo of departure) and the one reflected from the surface opposite to the entrance(bottom echo), are displayed on the screen of the instrument with the peaks, the distance of which is proportional to the time that ultrasound employ to along the outward journey and return from the probe to the reflecting surface present within the material. If during this path the ultrasound beam bumps discontinuities they act as reflectors, and on the screen, between the two previous peaks (eco starting and eco background), it will appear the other representing the indication of the type of discontinuity encountered.
The services offered by Punto Netto are characterized by the constant attention at the customer needs, through the continuous improvement of the structure, tools and skills. The team of specialists of Punto Netto, with the help of technologically advanced tools, allows you to effectively detect defects.


 Among the many services provided by Equity Point stand out the non-destructive testing, with Penetrating liquids, Ultrasound and Magnetic Particle.


