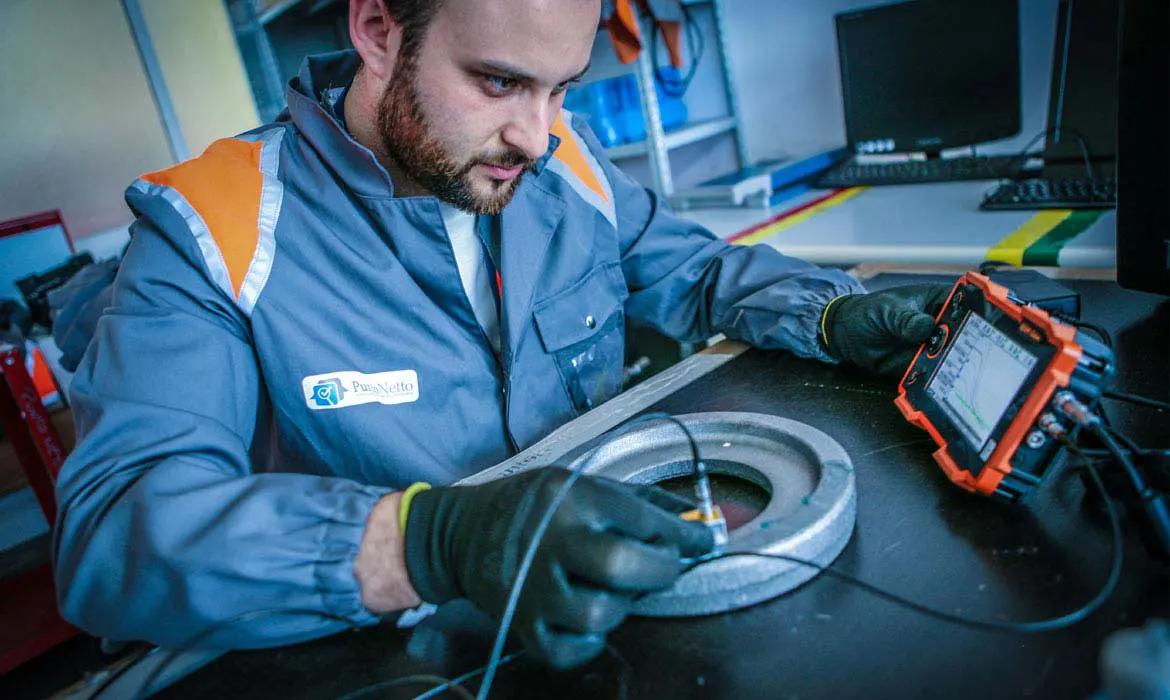
In depth analysis: The ultrasound testing
About the ultrasound testing
News: The ultrasound technique was introduced as a tool for non-destructive testing in 1960. It has since undergone an intensive development and has gained more and more acceptance. To date this is the technique primarily used for the validation of structures in many service applications: in fact it excels in the possibility of identifying position and size of the defect as compared to other methodologies and also allows the detection of many types of defects without the need to modify the instrumentation. The fact that the 'application of the method of ultrasonic non-destructive analysis is simple, implies that also the procedures and equipment are relatively simple and therefore less expensive compared to other techniques (X-ray radiography for example) that require, to obtain same results, more complex structures and consequently with a greater expenditure of resources.
Punto Netto LTD of Griso Gaetano provides technical support and quality control to engineering firms / automotive, by using ultrasound techniques.
Punto Netto staff is composed of personnel certified to Level 2 according to EN ISO 9712 and all the checks and tests are carried out according to strict safety standards.
The ultrasound non-destructive testing techniques are all based on the analysis of the phenomena of diffusion and reflection that ultrasounds undergo when they pass through a body of finite size.
Ultrasounds are elastic waves with the vibrational frequency of between 1 and 10 MHz (for certain applications it can extend the range from 20 KHz to over 200 MHz).
The ultrasonic waves spread in a material with a characteristic velocity and are reflected when they encounter a separation surface between two materials having different acoustic impedance ( surfaces of the examined workpiece, internal defects, voids, inclusions etc.).
From the examination of the reflected beam is generally possible to obtain information about the presence of defects, such as cracks, inclusions etc.. . The ultrasonic signal at the reception (reflected or transmitted) is characterized by two main parameters: namely the amplitude (that is, the peak value of the electronic impulse shown on the screen of the instrument in a particular representation called the A-scan) and the flight time (ie the time elapsed between the transmission impulse and that of reception, shown by the distance between the two impulses shown on the screen) that provides an indirect measurement of distance of the ultrasonic wave in the middle. In other words the starting signal of the ultrasound (called "eco departure") and the reflected from the surface opposite to that entry (called "wall echo"), are displayed on the screen of the instrument with the peaks, whose distance is proportional to the time that ultrasounds take to travel the way to and return from the probe to the reflecting surface present within the material. There are, in practice, three different survey techniques based on ultrasounds:
• A-scan technique;
• B-scan technique;
• C-scan technique.
In summary, the technique A-scan is a technique timely since it allows to detect intensity and crossing times of the ultrasound with reference to a single point of the specimen; the B-scan technique is a technique for lines since it allows to detect intensity and crossing times relative to the points placed in a line of the examined component; C-scan technique instead allows the relief of intensity and crossing times relative to the points of a scan plane x-y which can be varied appropriately in order to investigate the entire volume of the analyzed model. Among the three techniques, the C-scan is undoubtedly the most widely used in non-destructive testing.
The ultrasound testing for the detection of internal discontinuities (defects) into the materials, is basically performed with two techniques:
- Technique for transparency;
- Technique for reflection.
Technique for transparency
In the technique for transparency may be employed three methods:
- transmission
- reflection
- conduction
Technique for reflection
This technique consists in the identification of the presence of an echo due to reflection of the beam on a reflector. This echo is absent if the tested part is intact.
FIELD OF APPLICATION
Some of the main types of components that are usually checked with the ultrasound method for the detection of any defect are:
• Laminated components; rollers, shafts, drives, press columns
• Power apparatus: forgings of the turbine, generator rotors, pressure pipe, sets of welded parts, pressure vessels, reactor components
• Aircraft Components
• Materials machines
• Details rail
• Automotive Parts
So the ultrasound testing is a fast, effective and inexpensive inspection for the volumetric checking of simple or complex structures and components.
OPERATING PROCEDURE
Extension of control
The control must be performed on the whole volume of the piece so as to leave no unexplored areas. In the case where this is not possible because of the configuration of the detail to be examined or for other reasons, it must be reported in the checking test report. The probe must be moved on the control surface with an overlap between one step and the other is not less than 10%.
Scan speed
The scanning speed of the probe on the workpiece must not be higher than 150 mm / sec.
Coupling means
The coupling means to be interposed between the probe and the surface to be examined must have good wetting characteristics, and a good transparency to ultrasounds. The coupling mean should be chosen so as not to damage the surface of the detail.
Due to the need such mean may be selected from:
• Oil
• Gel for ultrasound
• Water
• Glycerin
It is important to use the same mean of coupling both for the calibration of the machine that for the control.
Preparation of the surface to be checked
The area concerned by the ultrasound inspection must be sufficiently smooth so as to allow a good fluency of the transducer.
From the checking surface must be removed: slag, spatter, dust, dirt, paint and anything else that could compromise a good coupling between the probe and the surface to be examined.
Procedure in the technique for reflection
This technique uses the signal reflected by any interface within the particular examined. The signal is characterized by the amplitude and position along the time axis which, in turn, depends on the distance between the discontinuities present in the material and the probe. The location of the discontinuity is defined on the basis of this distance, from the direction of propagation of the sound and the position of the probe.
It is recommended that each operator measures the amplitude of the signal of the reflector in relation to:
• an amplitude correction curve distance (D.A.C.) or to a series of D.A.C. curves built using sample blocks with artificially made discontinuities (holes drilled laterally, plane holes, carvings, etc ....)
• a diagram of equivalent reflection, method A.V.G.
Calibration of the instrument
Before each examination the instrument calibration should be done with the same transducers to be used during the inspection.
The calibration must then be verified:
• at least every three hours of work;
• when you turn off and on the instrument;
• when you replace the wire, the probe or change the means of connection;
• when the operator changes;
• when you have doubts about the correct functioning of the device.
ADVANTAGES
The main advantages provided by ultrasound testing compared to the other methods of non-destructive testing are:
• greater power of penetration in the middle, which allows to detect also discontinuities which are located within the material. The control of the material can also be done to several meters of depth, for example in the axial control of very long steel masts or forging pieces;
• high sensitivity that detects very small discontinuity;
• improved accuracy in determining the position of internal defects in the evaluation of their shape and orientation;
• it is sufficient that one of the particular surface is accessible;
• it is an electronic control that provides immediate relief of defects;
• allows the volumetric control of the piece from the upper surface to the lower one;
• the method does not entail any danger of radiation and has no side effect on the staff and other devices in the vicinity;
• it is easily transportable;
DISADVANTAGES
The disadvantages of the ultrasound testing include:
• The operations require great attention and experience of staff;
• The definition of the control procedures require technical expertise;
• Parts with high roughness surface or with a very small or thin or uneven surface are controlled with great difficulty;
• Discontinuity present in the layer immediately below the surface can get out of control;
• coupling means must be employed to facilitate the transmission of ultrasounds from the transducer to the material to be controlled;
• reference samples are required both for the calibration of the apparatus and for the characterization of defects.
Punto Netto LTD of Griso Gaetano overcomes these disadvantages by being able to offer its customers technical assistance in the choice of the non-destructive method that best suits the component to be analyzed and that better meets the needs of its customers. It has always taken care to provide high quality products, which are the result of continuous investments both on the training of its personnel and processes. Also on prices Punto Netto is to be competitive on the market both for the activities to be performed at the customer site and for the long-term ones.
In addition, as evidenced by the previous articles, the advantage that only Punto Netto can give is to be able to organize all the related activities so as to free the customer with the advantage of having a single interlocutor.
For all these reasons, we recommend that you contact Punto Netto not only for a quote which, we are sure, will certainly be beneficial, but also to experience the seriousness of the organization and the wide availability of all operators.


 Among the many services provided by Equity Point stand out the non-destructive testing, with Penetrating liquids, Ultrasound and Magnetic Particle.


